
Choosing the best Cable Swaging Tool in 2026 depends on the cable, fittings, and work involved. A hand tool that suits occasional railing repairs may not be right for repeated production work. The crimp should be secure and consistent, not merely neat from a distance.
Small details matter. Check the tool’s stated cable range, compatible sleeve materials, and included or replaceable dies. A mismatched die can leave a sleeve visibly uneven, while a poorly sized tool may require awkward force. Comfort matters too: long handles, a steady grip, and clear markings can make repetitive work easier. Not glamorous, but useful.
This guide compares tool types and selection criteria rather than declaring one universal winner. It looks at manual, hydraulic, and other common designs, along with capacity, build quality, ease of use, and value. Product specifications can change, so confirm current manufacturer information before buying. Where possible, examine sample crimps and follow the tool maker’s instructions for cable and fitting combinations. A tidy finish is not proof of a reliable connection.
There is a limitation worth admitting: ratings and feature lists cannot show how a tool feels after an afternoon of work. The right choice may be less obvious than a “best overall” label suggests. This overview will help narrow the options and explain what to check before you commit.
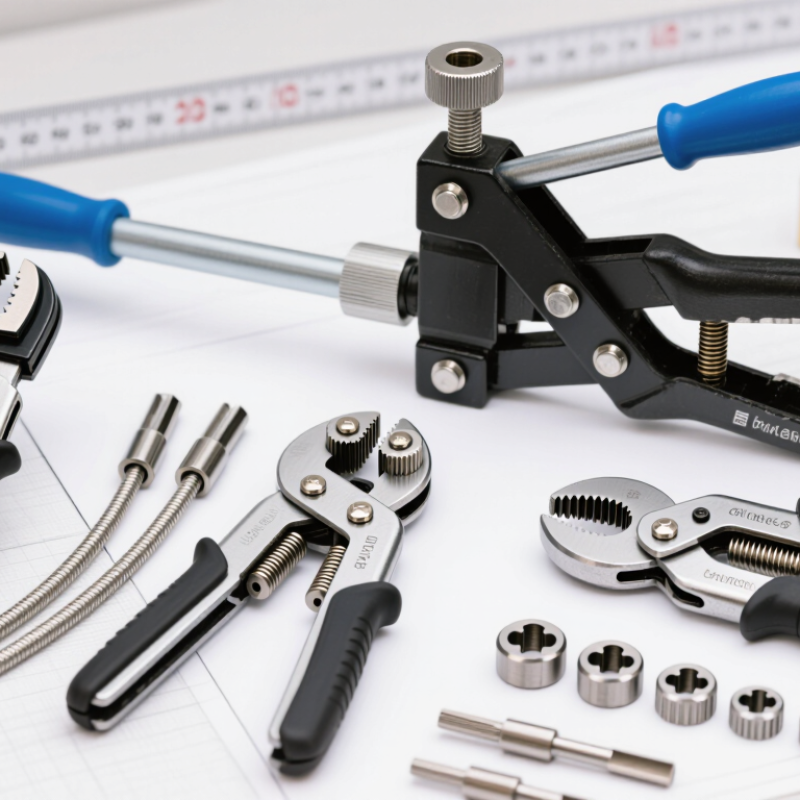
A cable swaging tool compresses a metal sleeve, or ferrule, around wire rope to create a fixed termination. The pressure reshapes the sleeve so it grips the cable strands. Not a knot. The result is a compact connection used in railing systems, shade structures, and other cable assemblies. Unlike ordinary pliers, a swager uses shaped dies designed for specific sleeve and cable sizes.
The right tool depends on the cable diameter, sleeve material, and amount of work. A hand-operated model may suit occasional, smaller jobs; hydraulic tools can make repeated swages easier. Check that the dies match the sleeve, since a poor fit can leave the connection loose or damage the wire. Small details matter. Before crimping, keep the cable seated correctly and follow the sleeve maker’s instructions. Afterward, inspect the sleeve for even compression, exposed or broken strands, and movement. A finished connection can look neat and still be weak. Where the assembly carries a load, use the specified inspection or proof-testing method rather than relying on appearance alone. There is some judgment involved, and that is exactly why a quick visual check should never be the whole test.
What Is the Best Cable Swaging Tool in 2026?
How Cable Swaging Tools Form Secure Connections
A swaging tool forms a connection by compressing a metal sleeve around a wire rope or cable. Matched dies shape the sleeve, pressing it firmly against the strands. The result depends on more than tool force: cable diameter, sleeve material, die size, and crimp sequence all matter. A good connection starts with compatible parts and a calibrated tool. Small details matter.
ASME B30.9 sets a 5:1 design factor for many wire-rope slings. That figure applies to the sling assembly, not as a guarantee that any swaged termination is safe. A sleeve that looks neat can still be under-crimped, over-crimped, or mismatched. Follow the assembly maker’s specifications, inspect the completed sleeve for cracks or uneven compression, and use qualified testing where the application requires it. I’ve seen appearance mistaken for proof; it isn’t.
Tips: Check the cable and sleeve sizes before crimping. Use the specified die, and keep the sleeve straight in the tool. Record tool calibration and inspection results. If the parts do not seat cleanly, stop and reassess rather than adding extra force.
The best cable swaging tool depends on cable diameter, fitting type, work volume, and where the connection will be made. Swaging tools compress a compatible sleeve or fitting around wire rope; a secure result requires the correct tool, dies, and fitting for the cable.
| Tool type | How it operates | Typical use | Advantages | Limitations and checks | Best suited to |
|---|---|---|---|---|---|
| Hand-operated swager | Long handles and shaped dies apply mechanical force to compress a compatible sleeve. | Small jobs, repairs, and cable assemblies within the tool’s stated capacity. | Portable, does not require a power source, and is generally straightforward to set up. | Capacity is tool-specific; hand force and correct die alignment matter. Check the tool’s cable-size and fitting specifications. | Occasional work and smaller-diameter cable, when supported by the tool. |
| Bench-mounted lever swager | A lever drives dies together while the tool is secured to a stable work surface. | Repeatable workshop work with compatible sleeves and cable sizes. | Fixed mounting can improve stability and help produce consistent, aligned compressions. | Requires a suitable workbench and may be less convenient to transport. Die profile and fitting compatibility must be verified. | Workshops and repeated assembly tasks within the specified capacity. |
| Hydraulic swager | A hydraulic mechanism drives matched dies to compress the fitting around the cable. | Higher-force applications or more frequent production work, depending on the model. | Provides substantial compression force with less manual effort than a hand-operated tool. | Tool capacity, die set, fitting material, and cable construction must all match. Hydraulic force alone does not establish a safe connection. | Frequent or demanding work where the specified cable-and-fitting system calls for hydraulic compression. |
| Battery-powered hydraulic swager | A battery-powered pump operates a hydraulic head and compatible dies. | Field installation and repeated work where access to mains power is limited. | Combines hydraulic compression with portability and can reduce repetitive manual effort. | Battery charge, tool capacity, maintenance, and approved dies are important. Confirm the manufacturer’s specifications for each fitting system. | Mobile crews and field work requiring a compatible powered tool. |
| Interchangeable-die swaging tool | Replaceable dies form different sleeve sizes or profiles when used with a compatible tool body. | Jobs involving multiple fitting sizes or approved compression profiles. | A suitable die range can make one tool system more versatile. | Interchangeable does not mean universal: dies must be approved for the tool, sleeve, and cable. Incorrect profiles can result in an inadequate connection. | Users who handle several compatible cable-and-fitting combinations. |
How to choose: Match the tool and dies to the fitting manufacturer’s instructions, cable diameter, cable construction, and fitting material. Follow the specified compression procedure and inspection requirements. Do not judge a swaged connection by appearance alone, and do not use a tool outside its rated capacity.
The best cable swaging tool depends on cable diameter, terminal type, and how often you work. For thin cable used on light-duty railings, displays, or small repairs, a hand swager is usually easy to control and store. Match its die to the fitting and cable size; a close-looking match is not enough. Small jobs, simple tools.
For regular workshop use, a bench-mounted or compound-leverage swager can reduce hand strain and help produce consistent crimps. It suits repeated work with compatible cable and terminals, but takes up space and still needs correct setup. I would not choose by handle length alone. Check the tool’s stated capacity and whether its dies fit the fittings you actually use.
Hydraulic swagers are suited to larger cable and high-force applications, such as substantial rigging assemblies. They can be powerful, but are heavier and less convenient for occasional adjustments. Portable hydraulic or battery-powered models may help on site, though their dies and power requirements need checking. No universal pick. Before relying on a finished assembly, inspect the crimp for gaps, distortion, or slipping, and follow the cable and fitting manufacturer’s installation guidance. A neat-looking swage is not proof of strength.
What features matter when comparing cable swaging tools in 2026? Start with the cable diameter range and sleeve materials the tool can handle. A tool that fits the hand but uses the wrong die profile can produce a loose or uneven swage. Check the manufacturer’s stated cable and fitting compatibility, then confirm that replacement dies are available. For repeat jobs, consistent jaw alignment and a clear way to inspect completed crimps matter more than impressive leverage alone. Small details count.
Force and ergonomics deserve equal attention. Manual tools may suit occasional work, while hydraulic models can reduce hand effort on larger fittings; neither guarantees a sound connection without correct setup. The U.S. Bureau of Labor Statistics reported 2.6 million nonfatal workplace injuries and illnesses in private industry in 2023. That broad figure is not specific to swaging, but it reinforces why grip comfort, stable positioning, and reduced repetitive strain belong in a tool comparison. Try the handle with gloves, if that reflects the real job. Awkward? That matters.
Also compare tool weight, portability, maintenance needs, and calibration guidance. Ask how the tool signals a completed cycle, and whether test samples can be checked consistently. A neat-looking crimp is not proof of holding strength. Follow the fitting and cable specifications, and use suitable inspection or testing procedures. Even careful buyers can overlook this: the best tool on paper may feel tiring after a full shift.
The best cable swaging tool depends on the cable, fitting, and working conditions—not just the cable’s diameter.
ISO 2408:2017 identifies key wire-rope specifications, including nominal diameter, construction, and tensile grade. Check the cable’s documentation against these details before choosing dies. A 3 mm cable with a compact strand pattern may need a different fitting and die profile than a 3 mm cable with another construction. Small differences matter.
Match fitting material to cable material and the environment. For stainless cable near salt spray, confirm the fitting is suitable for that exposure; mixed metals can corrode. The Wire Rope Technical Board’s Wire Rope Users Manual discusses how rope construction and termination choice affect performance. Use its guidance alongside the fitting maker’s installation specifications.
For light, occasional work, a hand tool may offer better control. For repeated swaging or larger fittings, a hydraulic tool can provide more consistent pressure. Still, pressure alone proves little. Use the specified die, inspect the finished swage with the correct gauge, and test a sample assembly when the application allows.
I would not skip that last step. It takes time, but a neat-looking sleeve can still be under-swaged.
QUICK LINKS
CONTACT US
Office: (+86) 755 23040566
Tel: (+86) 158 9965 5195
E-mail: sale@pcbledmodule.com
Skype: Hans@Rocket-PCB
Whatsapp: 86 1589965 5195
Office Address: 2207,Bid 4,He Gu Shan Hui Cheng,35#,Guang Tian RoYanluo street, Song Gang Town,518105 SHENZHENG, CHINA
Plant ADD.: No 69, Lianfeng North Road, Xianxi Area, ChangAn Town, Dongguan, China.


Copyright © 2025 Rocket PCB Solution Ltd. | All Rights Reserved Sitemap Friendship link: CNC machining heat sink